Category: Diablo II: Resurrected

Guides and news relating to the remastered classic, Diablo II: Resurrected

  • How to Terrorize Acts in D2R

    How to Terrorize Acts in D2R

    You can now Terrorize entire Acts in Diablo II: Resurrected, transforming every Zone in the Act into a Terror Zone until you quit the game. Learn what Terrorized Acts are and how they differ from Terror Zones, how to farm the Worldstone Shards you need to terrorize acts, and why Terrorized Acts are the best places to farm both Heralds and Colossal Ancients Statues.

    You can now Terrorize entire Acts in Diablo II Resurrected, transforming every zone in the Act into a Terror Zone until you quit the game.

    With the launch of the Reign of the Warlock DLC in Diablo II Resurrected, it’s now possible to expand Terror Zones until they take up entire acts. Terror Zones have existed for a while, and they contain stronger monsters that give you better drops.

    Normal Terror Zones shift every 30 minutes or so, but with Terrorized Acts, the entire Act remains Terrorized until you quit the game. It doesn’t move on to a different zone. You can progress through the Act at your leisure, enjoying the benefits of Terror Zones every step of the way.

    In this guide, I’m going to explain what Terrorized Acts are in Diablo II Resurrected: Reign of the Warlock. I’m going to tell you how to activate them, and explain the benefits of terrorizing Acts.

    Terror Zone Worldstone Keep in Act V of Diablo II: Resurrected

    What Are Terror Zones in D2R?

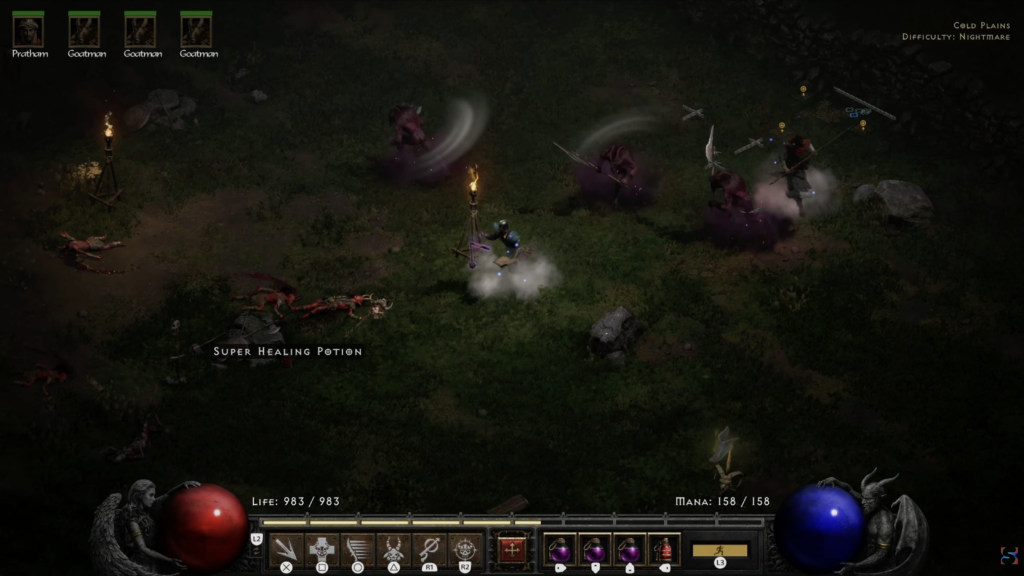
    Terror Zones are a great addition to Diablo II in general. They make it easier to get through those late levels. They give you extra loot, but they do periodically shift, meaning that you’ll have to move on to a new zone eventually instead of just farming the same one.

    You also have no control over which Zone becomes Terrorized. You’re simply stuck with whichever random Zone happens to appear in the rotation.

    List of Zones within Terrorized Act I in Diablo II Resurrected: Reign of the Warlock

    What Are Terrorized Acts in D2R?

    All of that has changed with the first DLC for Diablo II in 25 years, Reign of the Warlock. There are now items you can use to Terrorize entire Acts in the game.

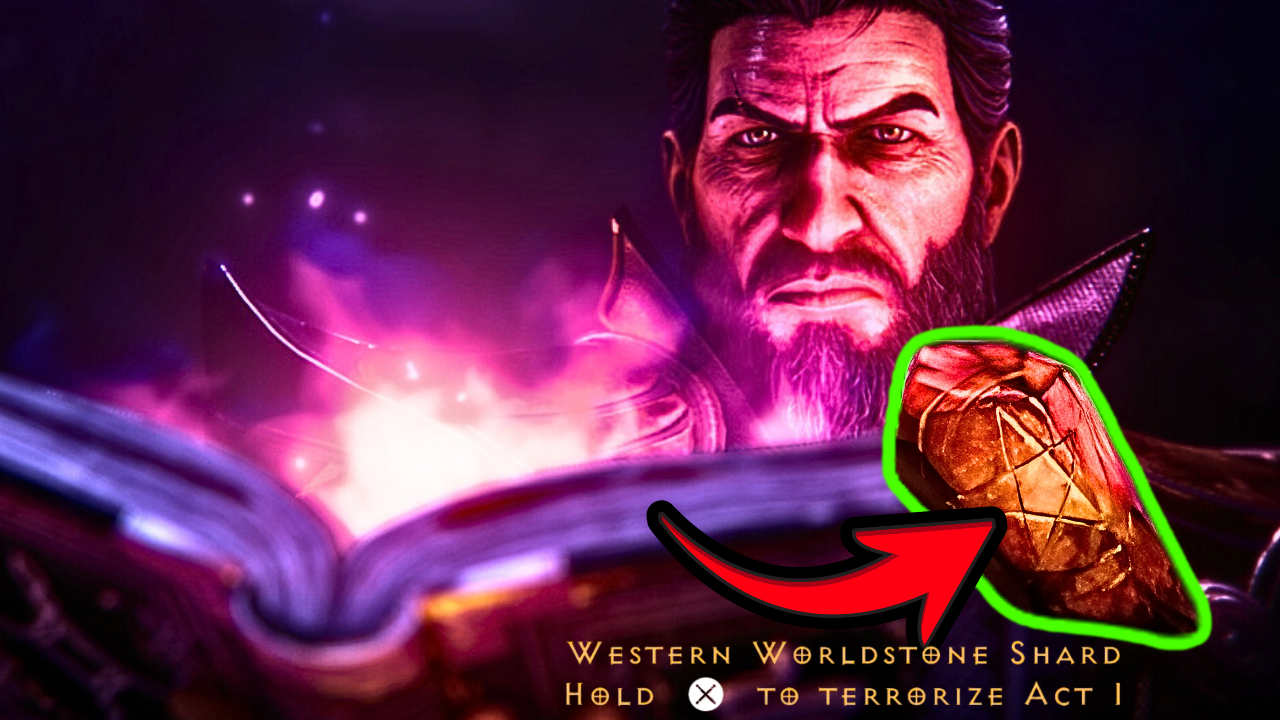
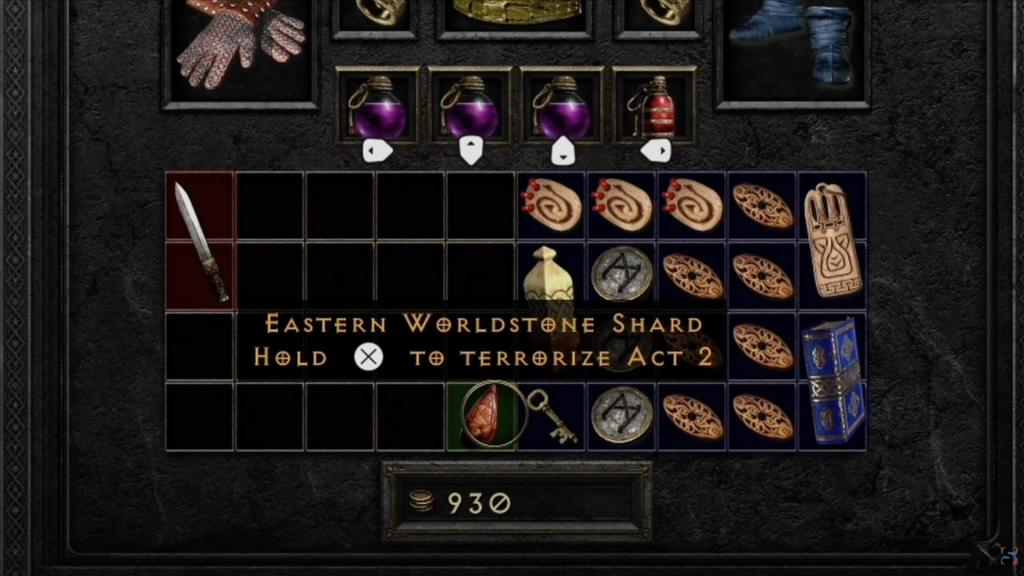
    You simply activate one of these items, called a Worldstone Shard, and then the associated Zct becomes Terrorized. When an Act becomes Terrorized, every single Zone within it becomes a Terror Zone.

    You can simply jump straight to the end and farm the Act Boss for Colossal Ancients Statues, or you can progress through the entire Act, reaping the benefits of Terror Zones all along the way.

    One of the main benefits of terrorizing entire Acts in Diablo II Resurrected is that the Act remains terrorized until you quit the game. There’s no more timer you have to worry about, where the Zone you’re currently in will expire relatively quickly.

    You can get up, walk away, come back to the game in a few minutes, and your Terror Zones will still be there waiting for you.

    Eastern Worldstone Shard item in Diablo II Resurrected: Reign of the Warlock, used to Terrorize Act 2.

    How to Farm Worldstone Shards in D2R

    The Worldstone shards you need to turn Acts into Terrorized Acts drop randomly from Terror Zones. So, you do need to go into normal Terror Zones to farm these items, and they have a relatively low drop rate. Once you’ve stacked up a few, you can wait until you have a relatively long period to play, terrorize the Act, and get going.

    Terror Zones and Terrorized Acts Can Be Active at the Same Time

    Terrorized Acts stack on top of the existing Terror Zone that’s going through the rotation. So, if you want, you can take a break from your Terrorized Act, go farm the current Terror Zone, and then come back to your Terrorized Act.

    In-game popup in Diablo II Resurrected: Reign of the Warlock indicating that the player has drawn the ire of a Herald.

    Best Herald Hunting Method in D2R

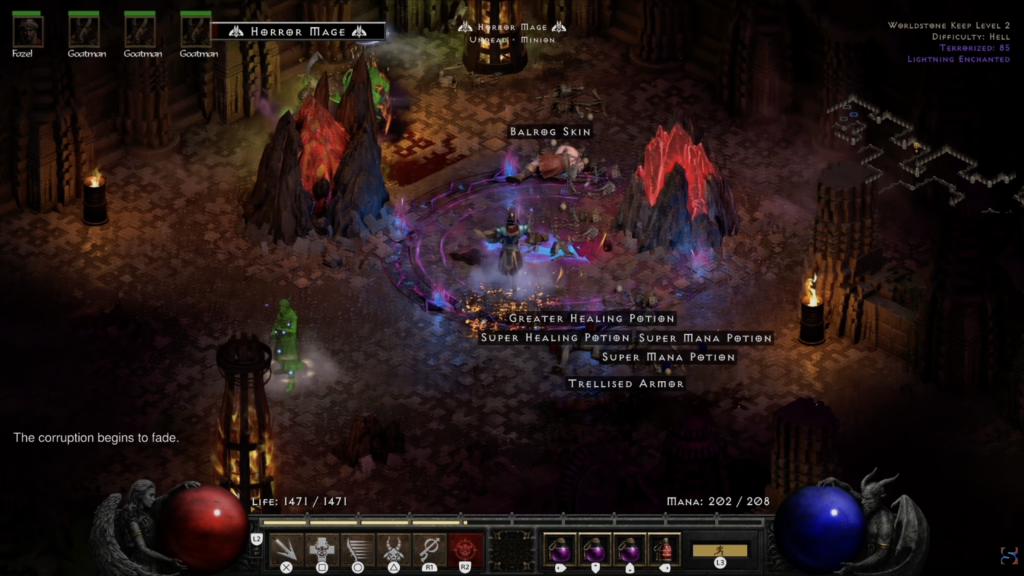
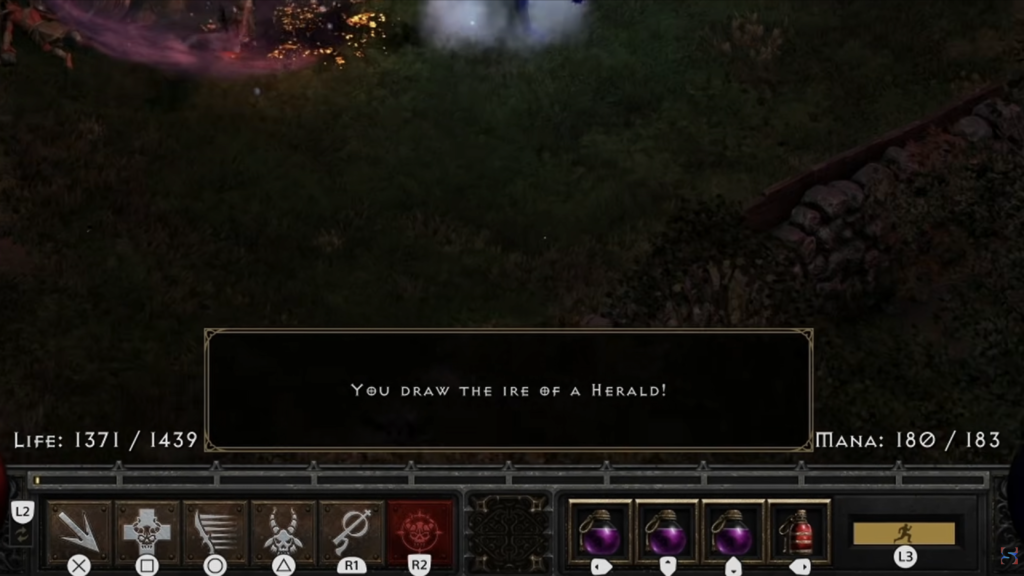
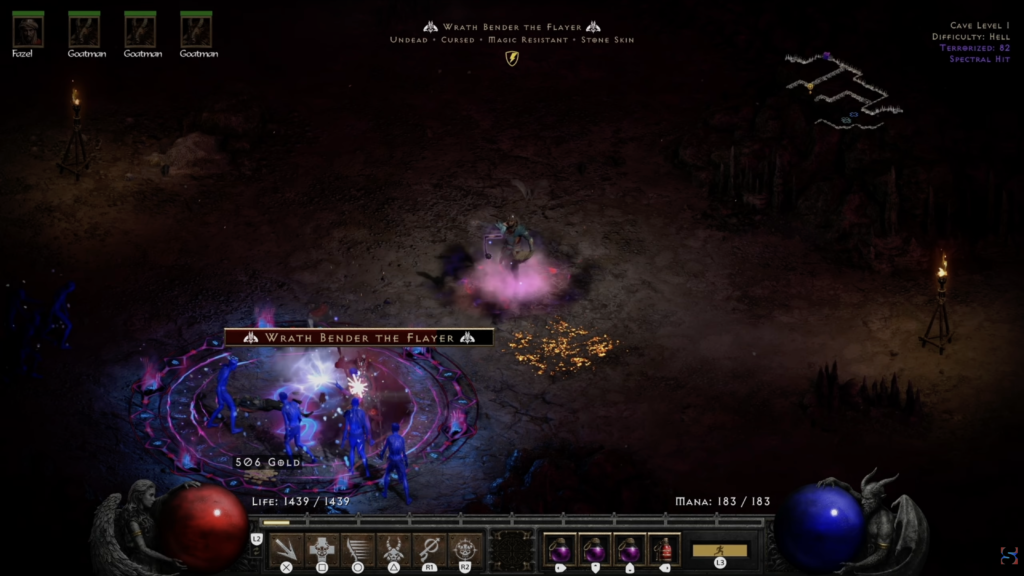
    Terrorized Acts are the most ideal way of farming Heralds, which are a new special type of monster in the game that have a chance of dropping better loot, including Latent Sunder charms.

    Heralds stack, meaning that for every one you kill, the next one that appears will be stronger. This goes all the way up to five tiers, with Tier 4 and Tier 5 Heralds being the strongest and also having the best chance of dropping good loot.

    The problem with farming Heralds in normal Terror Zones is that you don’t have very much time before the Terror Zone expires.

    Heralds appear when you kill Unique and Champion monsters. To farm them effectively in normal Terror Zones, you have to skip to Champions and Uniques. Even then, it’s very unlikely you’ll be able to farm enough of them to get four or five Heralds to appear during just a normal Terror Zone.

    With a Terrorized Acts, however, you have plenty of time to farm Heralds. There’s plenty of map space to crawl around hunting Champions and Uniques, making it much more likely you’ll be able to get up higher in the Herald tiers.

    All five Colossal Ancients Statues in Diablo II Resurrected: Reign of the Warlock.

    How to Get Colossal Ancient Statues in D2R

    Terrorizing entire acts in Diablo II Resurrected is also the best way to farm Act Bosses for Colossal Ancients Statues.

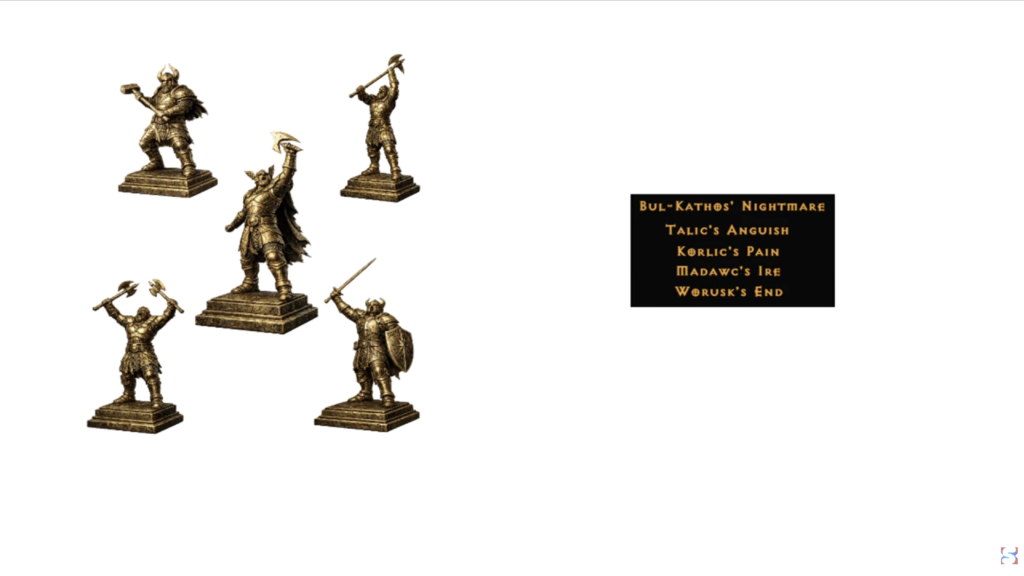
    The Colossal Ancients is a new endgame activity you can only access when you have five statues —one from each Act Boss — that you then combine to access this activity. But, Colossal Ancient Statues only drop from the Terrorized versions of Act Bosses.

    Without terrorized acts, you simply have to wait until the Zone where that Act Boss is goes through the Terror Zone rotation, and then simply hope that they drop you one of these statues.

    The drop rate for the statues is low enough as it is, making Terrorized Acts definitely the best way to get Colossal Ancients Statues and unlock the Colossal Ancients endgame activity.

    Cow Level Not Included in Terrorized Act I

    As a quick note, terrorizing Act I does not actually terrorize the Secret Cow Level (Moo Moo Farm) alongside it. That is considered a separate instance, meaning the only way to get the Cow Level as a Terror Zone is to simply wait for it to go through the rotation.

    Gameplay in Cave Level 1 in Diablo II Resurrected: Reign of the Warlock — Act 1 has been Terrorized.

    Summary

    That’s essentially the long and short of Terrorized Zcts in Diablo II Resurrected, a new feature added with the Reign of the Warlock DLC. I’m just going to run through a quick summary one more time to make sure that we’ve covered everything.

    • You can terrorize entire acts in Diablo II Resurrected: Reign of the Warlock by using new items called Worldstone Shards.
    • Worldstone Shards drop randomly throughout terror zones, and activating one will transform an entire Act into a Terror Zone.
    • Terrorized Acts stack on top of the existing Terror Zone that’s in rotation, meaning you can go back and forth if you want to.
    • Once an Act is terrorized, it stays that way until you quit the game, eliminating the time limit on Terror Zones that can make them hard to farm.
    • Farming Terrorized Acts is by far the best way to hunt Heralds, especially if you want to get up to the Tier 4 and Tier 5 Heralds.
    • Terrorizing an Act is also the best way to farm Terrorized Act Bosses, which have a chance to drop Colossal Ancients Statues.
    • You can combine five of those, one from each Act Boss, to access the new Colossal Ancients endgame activity.
    • In general, Terror Zones are the best way to farm the higher levels in Diablo II Tesurrected. Monsters are higher level, they have better drop rates, and it’s a lot more fun.

    Please let me know if there’s anything I missed or anything I could explain more clearly. Let me know how you’re enjoying Terrorized Acts, and in general, the new Reign of the Warlock DLC.

    If you haven’t yet, check out my Warlock leveling build. I will be coming out with an endgame build pretty soon as well.

    FAQs

    What is “Terrorized” in D2R?

    In Diablo II Resurrected, “Terrorized” refers to a mechanic that transforms a Zone (or an entire Act) into a higher-difficulty Terror Zone that scales with the player’s level. Unique visual effects occur when a player enters a Terror Zone, and monsters within the Zone yield higher XP and have better item drop rates. Some items, such as Worldstone Shards and Latent Sunder Charms, can only drop in Terror Zones.

    How do you get a Terrorized Zone in D2R?

    Terror Zones cycle randomly through all the Zones available in Diablo II Resurrected, including the Secret Cow Level (Moo Moo Farm). A new Terror Zone appears every 30 minutes on the hour and half-hour. You can control which areas of the map become Terrorized with Worldstone Shards — items that drop randomly within Terror Zones and Terrorize an entire Act.

    Why farm Terror Zones in D2R?

    The primary benefit of farming Terror Zones in Diablo II Resurrected is the increased amount of XP gained from monsters. In Terror Zones, monsters also have better drop rates of rare items. Plus, Terror Zones are the only places in the game you can find certain items, such as Worldstone Shards, Latent Sunder Charms, and Colossal Ancients Statues.

    Are Terror Zones in offline D2R?

    Yes, Terror Zone are available even if you play D2R offline. To make sure Terror Zones are present in your offline D2R session, select “Enable Terror Zones” in the game creation menu. For both online and offline play, it is necessary to first defeat Baal within the selected difficulty for Terror Zones to appear.

    How do Worldstone Shards work in D2R?

    Worldstone Shards terrorize entire Acts in D2R, and the Act remains Terrorized until you quit the game. To use a Worldstone Shard, simply make sure it is in your character inventory, and then simply activate it by long-clicking on its icon if you’re on PC. To activate your Worldstone Shard on console, hold “A” on Xbox, “B” on Nintendo Switch, or “X” on Playstation.

  • Pure Goatman Warlock Leveling Build for D2R

    Pure Goatman Warlock Leveling Build for D2R

    Command the forces of Hell to vanquish your foes with this Pure Goatlock build for Diablo II Resurrected: Reign of the Warlock. Primarily relying on Summon Goatman, Demonic Mastery, and Death Mark, this build also utilizes Sigil: Lethargy and Blade Warp for buffs and mobility. Find out which gear you should try to use with this Goatman Warlock leveling build, discover which Mercenary you should select and the gear you should give them, and learn other tips and tricks that will help you while leveling the Warlock in D2R’s new expansion.

    Your goats farm XP for you while keeping you completely safe from harm.

    I have been playing and loving the new Diablo II Resurrected DLC, Reign of the Warlock. The Warlock is everything I ever wanted from a summoner class in the Diablo series, and it still blows my mind that the game has a new class after 25 years.

    In this full Warlock leveling build guide for Diablo II Resurrected, my goal is to tell you how to get to high levels using very simple skills.

    We’re going to focus on the skills you should use, the stat points you should allocate, how to use the skills properly, and we’ll talk a little bit about gear. I’ll even touch on your Mercenary, including the gear you should equip on him for maximum effectiveness.

    It’s time to learn about this “goated” leveling build for the Warlock, which has gotten me really far through the game very easily.

    It’s absolutely true this class is OP. Let’s dive into it.

    Best Goatlock Leveling Skills in D2R

    We’ll start by covering the skills you need and the order in which you should get them. Of course, Summon Goatman is your main skill.

    Summon Goatman skill tooltip from Diablo II Resurrected: Reign of the Warlock.

    Goatmen are great because they’re melee tanks. They do a lot of damage and they have a chance of dealing crushing blows. I would put my first few skill points into Summon Goatman and then start dividing your points equally between Goatman and Demonic Mastery.

    Demonic Mastery skill tooltip from Diablo II Resurrected: Reign of the Warlock.

    Demonic Mastery is a skill that will allow you to eventually get multiple goats. So, it’s worth putting some points into that right from the beginning.

    Death Mark skill tooltip from Diablo II Resurrected: Reign of the Warlock.

    Then, once you get to level 6, it’s time to start investing in a couple other skills. First is Death Mark, which sends your goats to a particular location.

    This is incredibly useful because as a summoner, I’m used to enemies targeting me and not really being able to do anything to stop them. But with this skill, you can make your goats attack specific enemies, and you can also summon them in front of you if you’re being attacked by mobs.

    Death Mark also increases the damage that your demons do, and it decreases the defense of the targeted enemy.

    Sigil: Lethargy skill tooltip from Diablo II Resurrected: Reign of the Warlock.

    At level six, you’re also going to want to invest one point into your sole Chaos skill, the Sigil: Lethargy. This makes a really cool visual effect on the ground, and it also slows enemies, reduces their attack speed, and increases their damage taken, and reduces their defense.

    Blood Oath skill tooltip from Diablo II Resurrected: Reign of the Warlock.

    You only need one skill point in Death Mark at first. And while I do suggest investing at least a few points into Blood Oath eventually, you can leave it alone for now.

    Up until you get to level 18, just keep dividing your points somewhat equally between Summon Goatman and Demonic Mastery. Getting Demonic Mastery to level 10 at least will give you a huge boost because then you can have two Goatmen instead of just one.

    Blade Warp skill tooltip from Diablo II Resurrected: Reign of the Warlock.

    Once you get to level 18, it’s time to get Blade Warp. You’ll need three skill points to do so. Put one into Levitation Mastery, one into Echoing Strike, and then one into Blade Warp, and that’s all you’ll need.

    This is mainly a mobility skill. You’re not really going to be using it for damage, but you throw your blade and you teleport to that location. You can’t teleport through walls, but you can go anywhere within your line of sight.

    Blade Warp is great for getting away from monsters, getting through walls you can see through, like jail cell walls, getting across rivers like in the Sewers of Kurast. It’s not quite as good as a Sorceress’ teleport, but it’s still a pretty good teleport skill.

    Skills to Max First

    From there, your main goal is simply to max both Demonic Mastery and Summon Goatman. Maxing Demonic Mastery first is usually a good idea, but it doesn’t give quite as much damage as the Goatman skill itself.

    Once you do get to level 20 in Demonic Mastery, you’ll be able to summon three goats at once, which gives you a huge boost to damage. By the time you get to around level 40, you should be able to have 20 points in both Summon Goatman and Demonic Mastery.

    Engorge skill tooltip from Diablo II Resurrected: Reign of the Warlock.

    When you get to level 24, you may also want to invest a point in Blood Boil and then Engorge.

    Engorge allows you to heal your goats, which costs a lot less than resummoning them, but I hardly use it at this point because my goats are tanky enough.

    Once you’ve maxed out both Summon Goatman and Demonic Mastery, it’s time to start investing in Death Mark and then Blood Oath. Every point you invest in Death Mark gives another 1% chance of your goats using a Crushing Blow, which reduces the monster’s total HP by 25% (12.5% on bosses).

    It’s really great against bosses, especially at the beginning of the fight. Additional points in Death Mark also do increase the reductions to defense and increases the damage that it provides.

    And then when it comes to Blood Oath, the entire point of this skill is simply making your goats tankier, which is really useful against bosses who can relatively quickly decimate your goats. This saves you from having to resummon them, which uses a lot of mana.

    Endgame Skill Allocation

    Once you’ve invested 20 points in Goatman, Mastery, Blood Oath, and Death Mark, you’ll be at level 80. And from that point, you can just start investing in your Sigil to make it bigger and stronger.

    You can invest in Engorge to make it provide more health back to your goats — or really whatever you want past that point. This isn’t an endgame build. I’m not really thinking about anything beyond level 80 when leveling really slows down.

    The main point of this build is to get you to level 70 or 80 by which point you’ll have completed Hell Difficulty and you’re moving on to the endgame.

    So those are the skills for this build. Summarizing it again one more time:

    • Your main skills are Summon Goatman and Demonic Mastery, which you should invest in early.
    • Once you get to level 6, put a point each into Death Mark and Lethargy.
    • When you get to level 18, invest in Blade Warp.
    • And, when you get to level 24, get at least one point in Engorge.
    • Along the way, you might want to put a couple points into Blood Oath if your goats don’t seem tanky enough.
    • Once you’ve done all that, max out Goatman and Demonic Mastery, and work on maxing out Death Mark and then Blood Oath.
    Ideal Goatman Warlock stat points for Diablo II: Resurrected, focusing on Vitality with no added points in Energy.

    D2R Goatman Warlock Stat Points

    Now that we’ve covered the skills, let’s take a quick look at stat points. As is usually the case with leveling builds in Diablo II, you’re going to want to invest all your points that you can into Vitality.

    This improves your tankiness and helps you survive against mobs and bosses. You won’t need any points in Energy, and you’ll understand why when we start talking about the Mercenary.

    When it comes to Strength and Dexterity, just invest as many as you need to wear your gear. Eventually, you’ll also get gear that increases these attributes.

    Just put everything into Vitality except what you need to put into Strength and Dexterity to use the gear that you want to use.

    Screenshot of Goatman Warlock leveling gear, featuring the Skin of the Vipermagi chest piece.

    Leveling Gear for Goatman Warlock in D2R

    Speaking of gear, let’s talk about good leveling gear for this build. Of course, early Runewords like Lore and Spirit are good here.

    You should be able to get most of the runes you need just leveling, but if you need any more, just go fight the Countess in the Black Marsh. She almost always drops Runes.

    I haven’t gotten a four-socket shield yet to put Spirit into. So until you can do Spirit, just keep an eye out for any Warlock Books that give skill points to either Demonic Mastery or Goatman.

    Also, while you’re leveling, keep an eye out for Knives, which now drop with Warlock skill points on them. And again, just look out for Goatman or Demonic Mastery.

    Once you do get to level 55, Heart of the Oak is an excellent Runeword to slot. It gives you +3 to all skills and a lot of other buffs.

    Aside from that, just try to find the best unique items you can put in other slots.

    • Chance Guards is good for gloves because it helps you get other gear.
    • Sander’s is fine for boots.
    • Skin of the Vipermagi works pretty well for the chest because it gives you plus one to all skills and increases your resistances.

    And then in the jewelry slots, I have:

    • Manald Heal for extra life replenishment, which is really important if you don’t want to be using potions all the time.
    • On the other ring, I have a Nagelring.
    • On the amulet, I have the Mahim Oak Curio.

    And I’ve got a Goldwrap on for my belt.

    You just want to be stacking resistances plus the skill points if you can and also Magic Find so you’ll be able to get the better gear you’re going to want later on.

    Mercenary gear in Diablo II Resurrected: Reign of the Warlock, focusing on the Insight Runeword on a Bill Polearm.

    Best Mercenary for D2R Goat Warlock

    That just about covers it, but let’s touch on your Mercenary here before we finish up.

    As soon as possible, it’s important to get an Insight Runeword on your Act 2 Mercenary. The best Aura for your mercenary is Blessed Aim because that increases the attack rating of your goats.

    But as long as your Mercenary has Insight, you won’t even need to use any mana potions. Your mana will replenish basically instantly, allowing you to keep resummoning goats if they die as long as your mercenary is alive.

    Insight is also just a cheap and good Runeword for your mercenary anyway. Also on my merc, I have the Cow King set. It’s really not the best armor for the merc, but it works pretty well.

    Just try to get anything with high defense and high resistances. Honestly, what’s best for the chest of your mercenary is the Treachery rune word, which is Shael Thul Lum. But I haven’t gotten the runes I need for that yet.

    Just put Insight on your merc and you’ll be set for mana.

    Gameplay screenshot of a Warlock character in Diablo II Resurrected traveling through Act I with three Summoned Goatmen.

    Summary

    I’m just going to summarize everything one more time.

    • Your main skill is Summon Goatman.
    • Your Goatmen will be able to get in between you and enemies using Death Mark, and you’ll be able to have three of them once you max out Demonic Mastery.
    • You can heal your Goatmen using Engorge.
    • You can make them stronger using Sigil: Lethargy.
    • Your “oh crap” button is Blade Warp, which allows you to get out of trouble or cross environmental obstacles.
    • And you’re going to want to dump every stat point you can into Vitality.
    • As far as gear goes, try to get a Spirit shield and Heart of the Oak on your weapon as soon as you get high enough level.
    • And otherwise just simply items that give you plus to skills, resistances, and Magic Find chance.
    • Your Mercenary should be an Act 2 Mercenary and use the Insight Runeword, and Cow King’s works as a set.
    • You’ll be better off with the Treachery Runeword and maybe a Lore Runeword on the helmet.

    What I love about the Warlock is it stays true to what Blizzard said about it: that is a sandbox class. You can do so many different things with it.

    So, I thought I’d just do what I felt like doing, which is Goatman all the way. I’m excited to see how far I can get with them.

    So far, everything in Nightmare Difficulty has been easy. I’m just about to get to Hell difficulty, which I don’t imagine being that much harder.

    It’s really cool that you can just go with the first skill that you get and it can be viable all the way through the game. I’m loving the Warlock so far.