
Start your new character off right in The Elder Scrolls Online, whether it’s your first toon or your 20th.
In this guide, I’m going to provide you with a checklist of the first 17 things you should do on a new character in The Elder Scrolls Online. The guide is designed to cover two distinct purposes:
One, to serve as a beginner guide for people who are brand new to the game and don’t have any idea what to do.
Two, to provide a checklist for veteran players who sometimes forget which things they should do when they start a new character.
Let’s dive into the checklist.
1.) Best ESO Settings
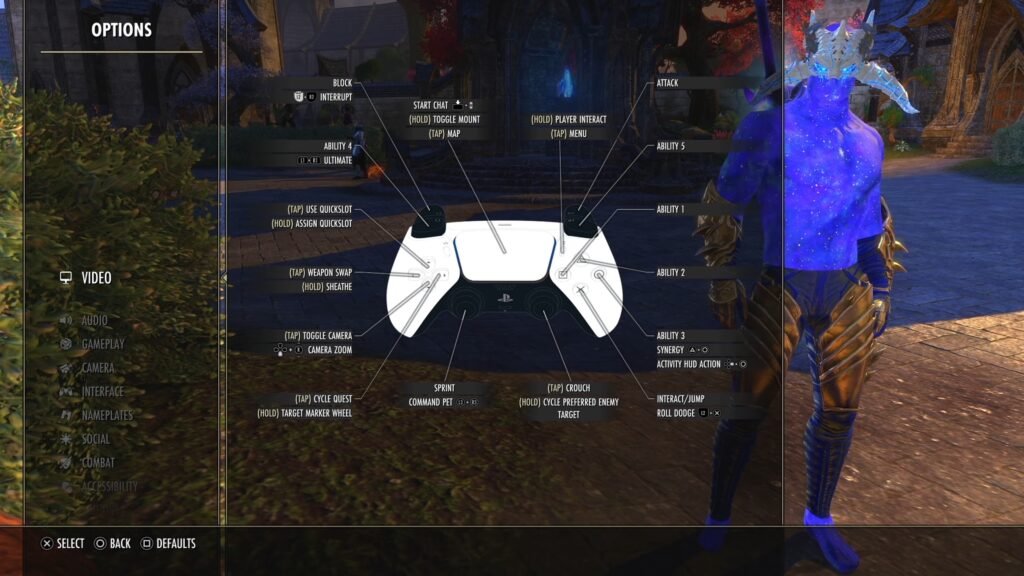
The first and foremost thing I have to remind myself to do on every new character is go into the settings and fix all the default options that mess everything up.
To do so, open up your Menu, and go to Options.
Video is usually fine and doesn’t require any changes on new characters.
Gameplay is the first place you’ve got to go around and start messing with things: Auto Loot: On. Tutorials: Off.
Camera — First-Person FOV: All the way up. Third-Person FOV: All the way up.
Interface — Quest Tracking: On. Nameplates: On. Social Text Size: Medium. HUD Chat Display: On. Profanity Filter: Off. Leaderboard Notifications: Off. Auto-Decline Duels: On. Auto-Decline Tales of Tribute: On.
Combat — Ability Bar: Automatic. Ability Bar Timers: On. Attribute Bars: Automatic. Resource Numbers: On, Number & Percent. Active Combat Tips: Don’t Show. Ultimate Number: On. Combat Text: On. Buffs and Debuffs: Automatic.
That’s how I like to tweak my settings with every new character in ESO. Making those simple tweaks will save you a lot of pain and heartache down the road. I definitely recommend changing around your settings as the very first thing you do when you make a new character.
2.) Change Appearance in ESO
To me, it’s really important on every new character to make sure my drip is on lock. If you’re new to the game, it’s understandable if you don’t have epic drip. But for veteran players, you’ve got no excuse.
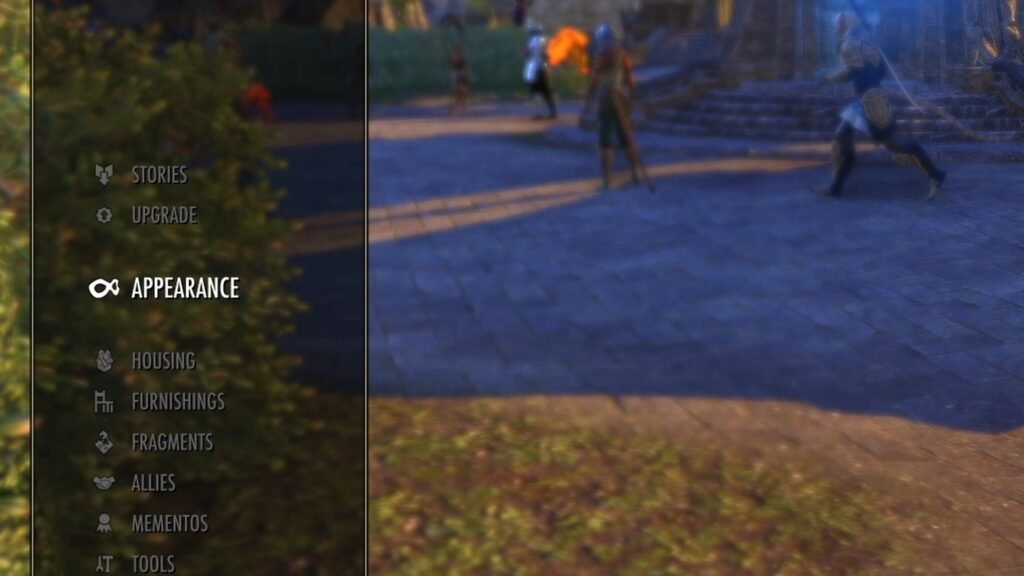
Head over to the Collectibles menu and the Outfit Station to set up a unique look for your new character. A lot of the style options in the game will be found under Collections > Appearance, and you have a whole bunch of different categories here: Hats, Hairstyles, Head Markings, Facial Hair, Major Adornments, Minor Adornments, Costumes, Body Markings. Skins, Personalities, and lastly — if you’re lazy and just want to transform into something — Polymorphs.
But that’s only half of the battle. To truly set up some epic drip on your character, you’ll also need to visit an Outfit Station, located in or near the crafting area of every major city. You can also get one as a Furnishing in your Home.
The Outfit Station combines all of the Armor and Weapon Motifs and other styles you found throughout your adventures, as well as all the Dyes you can apply to them. So, armor styles for your head, your chest, shoulders, hands, waist, legs, and feet — and then also your weapon.
When you’re brand new to the game, the only Outfit and Weapon style you’ll have unlocked is the one for your particular race. But all the other base racial weapon and armor styles are very easy to get. They’re very cheap, so you might as well invest in those early. And then there are tons you can grind throughout the game and a lot more that are also available through the Crown Store.
Once you’ve chosen the styles you like, there are hundreds of dyes to choose from: Common, Uncommon, and Rare. And what’s cool about Dyes is all of them are unlocked through the game. Techically, you can buy Dye Stamps in the Crown Store… I really recommend that you don’t.
Otherwise, these are all from Achievements and other actual gameplay sources. I, like many, am of the opinion that style and fashion are the true endgame of ESO. Whether this is your first character or your 20th, it’s always a good idea to get in on that endgame as early as possible.
3.) Mount Training
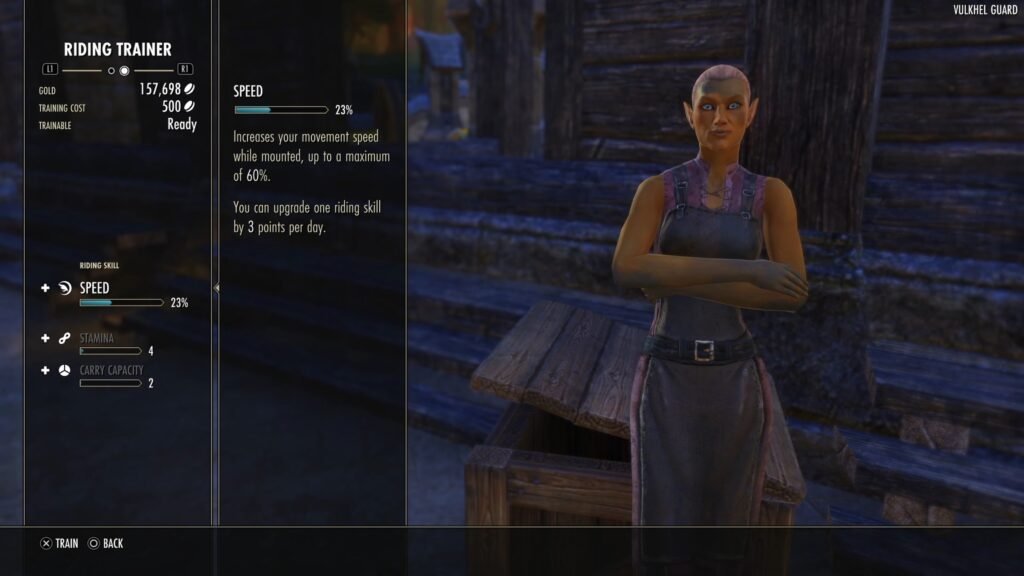
Once you’ve set your settings and gotten an ideal look on your character, it’s time to pay your first visit to the Stablemaster. You go talk to a Stablemaster — located in every major city — choose a particular riding skill to invest in, pay a pittance of gold, and there you go: You’re 3% higher in that riding stat.
In Update 49, the developers changed the amount you can increase your mount’s riding skill per day from 1% to 3%. So, even if this is your first day with a new character, getting that extra 3% is going to get you between Dolmens and Wayshrines a lot faster. Definitely don’t skip that first visit to the Stablemaster and keep going back every day.
4.) ESO Champion Points Guide (Vet Players)
This next tip is for veteran players making additional characters only. So, if you’re a noob, sorry, you can’t read this one. Just kidding, but you may want to skip ahead.
There are some real benefits to investing Champion Points in your character as early as possible. And if you’ve already accumulated Champion Points on another character, you don’t have to wait to apply them to a new one.
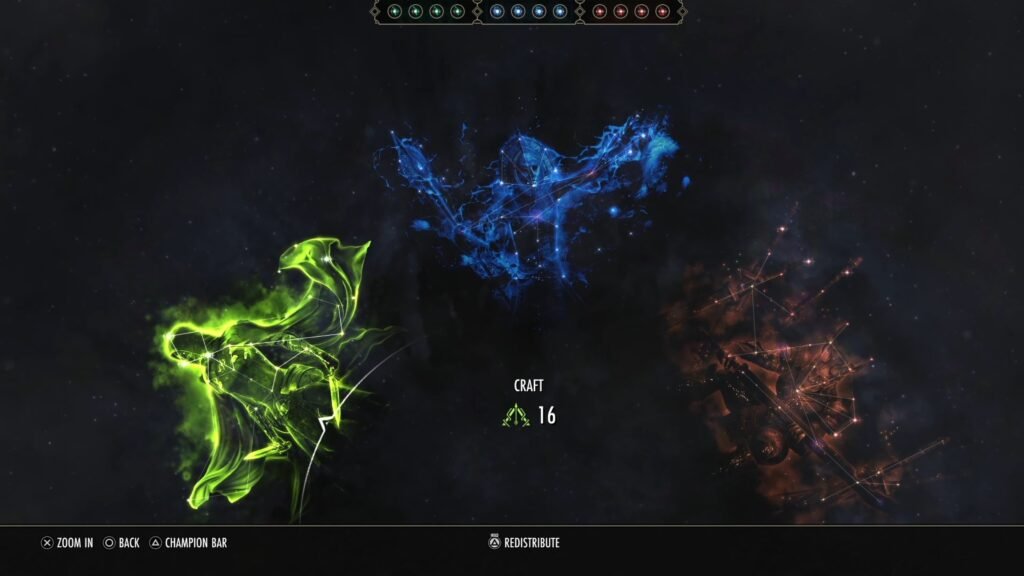
Some of the most important Champion Points to apply are actually in the green tree. Nodes like Steed’s Blessing, which improve your movement speed; Discipline Artisan, which increases the rate at which you level up your skill lines; Breakfall, which reduces your fall damage; Wanderer, which reduces the cost of Wayshrines; and even way up at the top, War Mount, which makes it so your mount has no stamina cost — as long as you’re not in combat, you can just keep going on your mount without it getting tired out.
Over in the blue tree, you want to get some of the passive nodes as early as possible, like Eldritch Insight and Tireless Discipline. Also Precision — but you may want to hold off on the slottable nodes for a while until you really know what you’re going to be doing with this build.
Same goes with the red tree. Just get some of the basic passives like Hero’s Vigor, but then I do recommend investing immediately in Bloody Renewal if you’re running a stamina build or Siphoning Spells if you’re running a magicka build. These will help with your sustain massively as you’re going through the initial levels.
For those who already have some Champion Points to spare, there’s no reason to wait when allocating them to a new character. For new players, just wait. You’ll get to Champion level eventually and then you’ll be able to dive into the whole Champion Point system.
I do have video guides to the Champion Point system and the character creation process. If you haven’t even created your character yet, definitely check out that video before continuing.
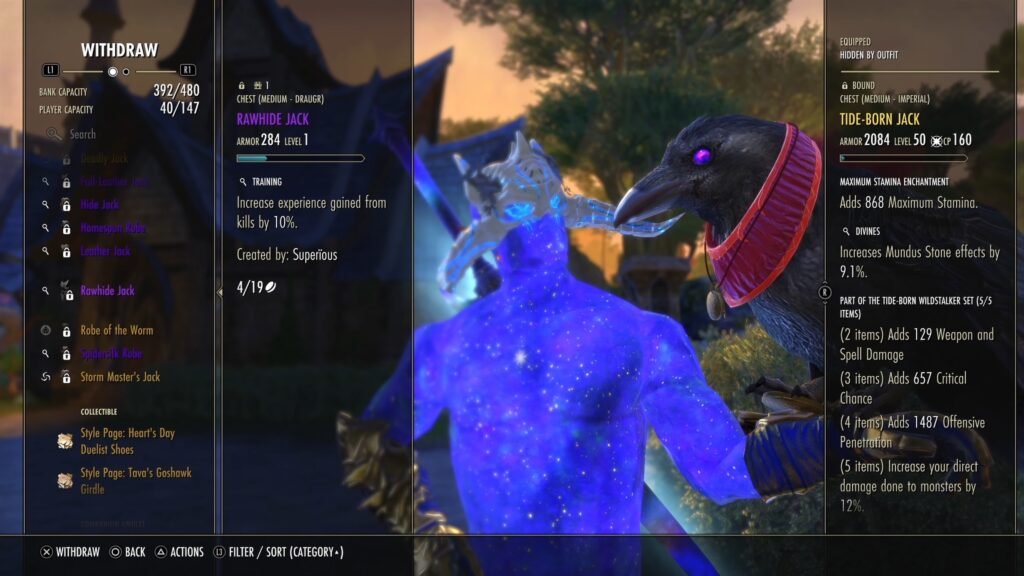
5.) ESO Training Gear
So, now you’re ready to go out and start some adventuring in Tamriel, right? Wrong. You still need to get some Training gear on your character first.
Training gear increases the rate at which you gain XP considerably. Before you go out and do anything, you’re going to want to get yourself some Level 1 Training armor and a Training weapon.
If you want to make a magicka character, I generally recommend going with Light Armor and a Destruction Staff. For a stamina character, you’re going to want Medium Armor and probably a Greatsword. If you’re planning to make a tank, you want Heavy Armor. And in that case, I’d recommend getting a sword-and-board, meaning a One-Hand and Shield.
How do you get Training armor, you might ask? Well, it’s going to be hard to craft it as a brand-new character. If you’re a veteran making a new toon, just make sure you have some Training gear in your bank before you start a new character.
But otherwise, one great method at your disposal is simply asking for help. There are exceptions, of course, but generally people who play The Elder Scrolls Online are very helpful and friendly. In any populated zone like Auridon, you’re going to find somebody who’s willing to make you some Level 1 Training gear for free. You don’t have access to Guilds until Level 10, but that can also be a great way to find someone to craft you some Training gear.
As long as you’re not really shy, I’d recommend just going ahead and posting in Zone or Local Chat right after you make your character, asking for somebody’s charity to make you some Training gear. And of course, if you’re a veteran player with a crafting toon already, you can just make your own Training gear — and then maybe share some with a noob. But yes — Training gear is essential. Make sure you slap on a full set of Training gear before you start adventuring.
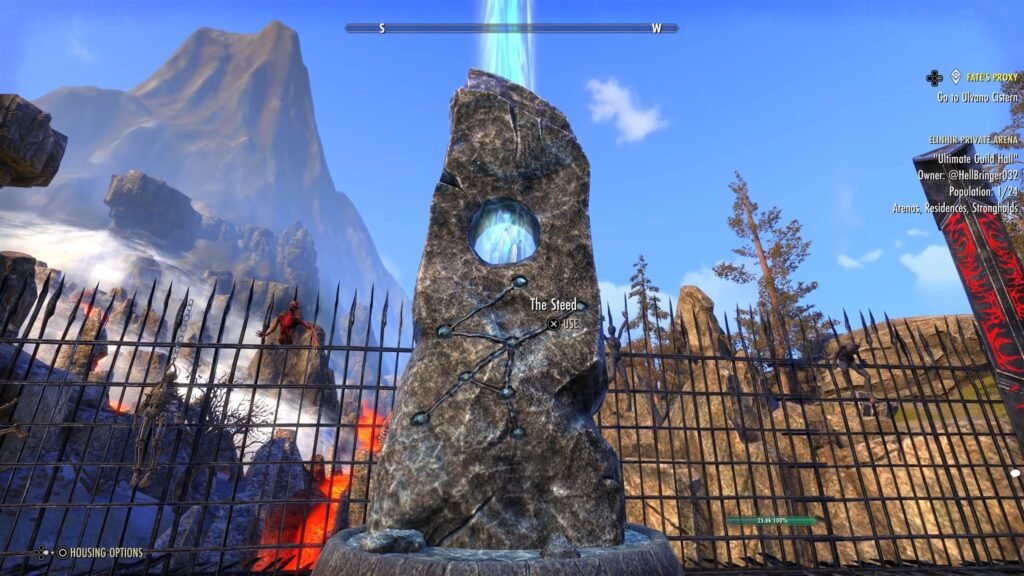
6.) Mundus Stone (How To)
Also, before you start running around and killing things, you’re going to want to make sure that you’ve gotten yourself a Mundus Stone buff. You can only have one of these on your character at a time (unless you have a certain set), but they provide a pretty significant boost to one particular stat.
What you should go with when in doubt is The Thief, which increases your Weapon and Spell Critical Rating. Mundus Stones are scattered throughout the world of Tamriel, and if you need help finding one, the new and improved Zone Guide will guide you right to them. Just select “Track Mundus Stones” and you will see where the nearest one is.
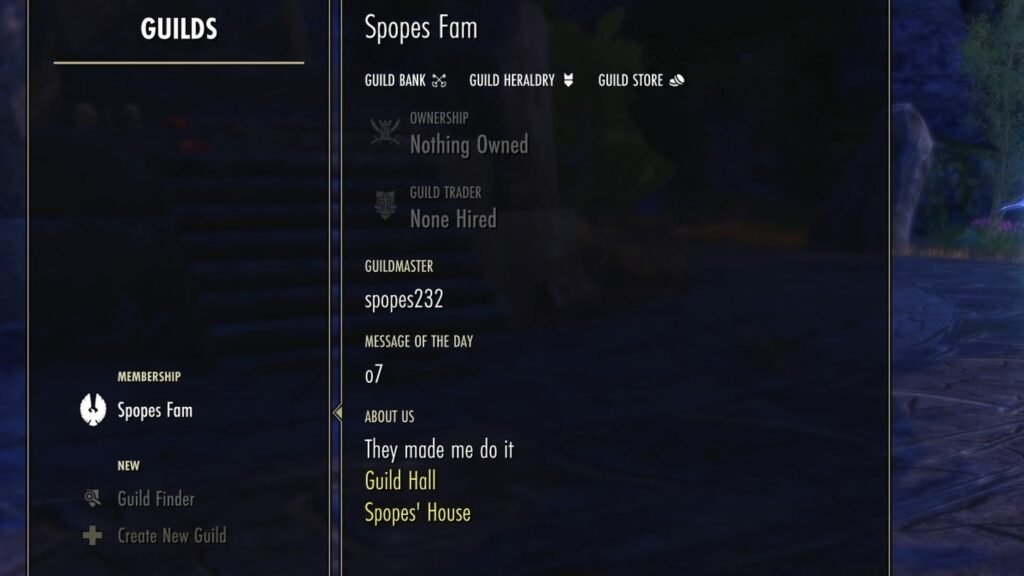
Also, once you get to Level 10, you can join a Guild with a fully stocked Guild Hall like Spopes Fam. A properly stocked Guild Hall will have all of the different Mundus Stones available, so you can switch through them at will.
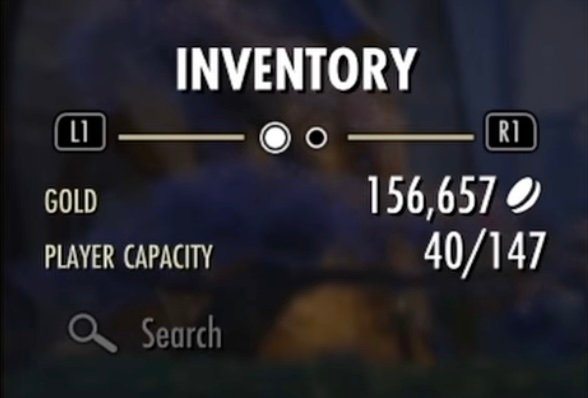
7.) Increase Bag & Bank Space in ESO
What you want to do next is make sure you have enough room for all the amazing gear you’re about to get. If you haven’t maxed out your Bag Space yet, you will see a tool tip in your inventory reading: Increase Bag Space. You simply click on it, you pay the gold for it, and you’re good to go. When ZOS added this option directly to the UI, they also decreased the amount it costs to increase your Bag Space by 50%.
As a brand-new player, you probably won’t have enough gold to max out the Bag Space on your character. But, as a veteran player, you should just set some gold aside that your new character can grab out of the Bank and use to max out their bag.
Speaking of the Bank, it’s also a good idea to max out your Bank Space as soon as possible. The developers also decreased the amount this costs by 50%, there’s never been a better time to invest in Bank Space.
You definitely want to make sure you have enough space for all your goodies. Invest in Bag and Bank Space early and frequently.
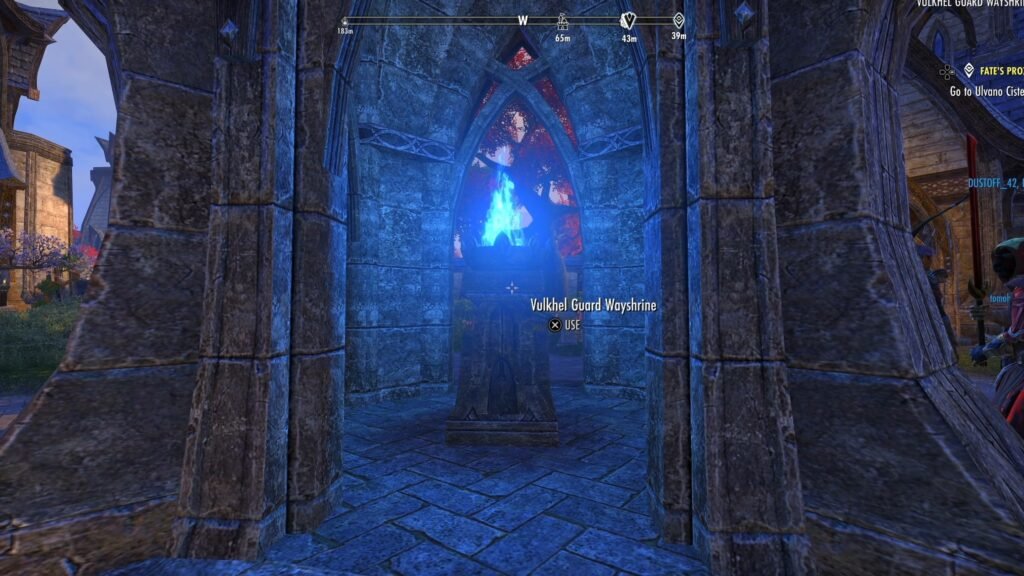
8.) Get Wayshrines
You’ll also find that your adventuring involves, well, a lot of… adventuring. And the main way that you get around while you’re adventuring is with Wayshrines. These allow you to instantly teleport between areas within Zones or between different Zones. So, as you run around the world of Tamriel, definitely look out for Wayshrine icons on your map and unlock them by getting nearby.
If you want some help in tracking down Wayshrines, the Zone Guide is your friend. You can just go to the Zone Guide, select “Track Wayshrines,” and it will show you where the nearest one is.
It’s definitely better to unlock Wayshrines early before you need them rather than to suddenly realize you have to trek across half of a Zone just to get where you want to go.
9.) Join NPC Guilds in ESO
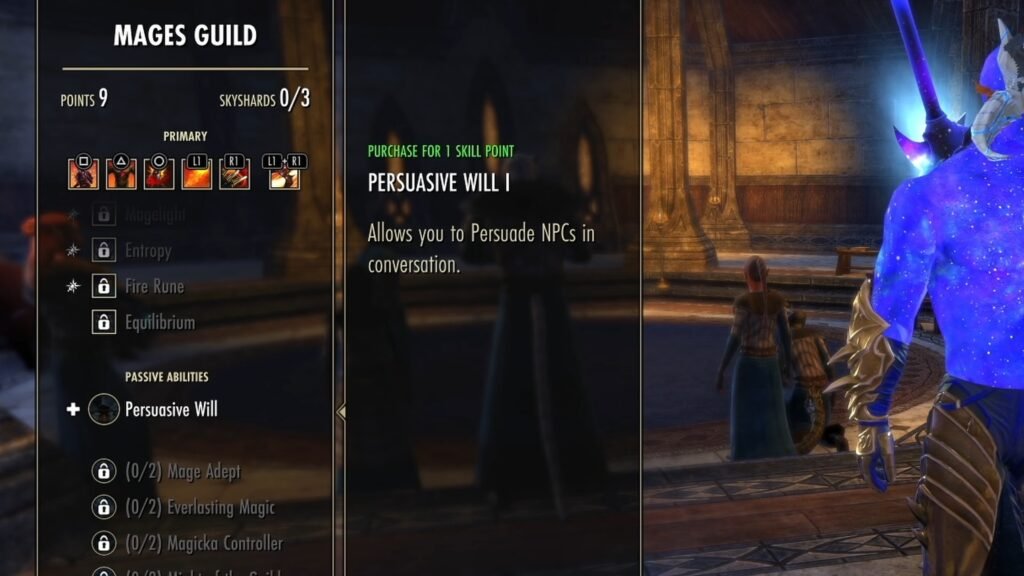
If you’re at all interested in questing, you’ll find that a lot of quests require you to either Persuade or Intimidate NPCs. To do so, you’ll need to unlock the Mages and the Fighters Guild Skill Lines, which is actually pretty easy.
I have a guide already on how to unlock and level the Mages Guild Skill Line, but recapping briefly, you just go to a Mages Guild (located in every major city), and then you talk to the Magister and say you want to become part of the Mages Guild.
The Mages Guild skill line will then be unlocked, and you can invest a Skill Point in Persuasive Will, which will allow you to persuade NPCs, saving you leg work while questing.
The process is pretty similar for the Fighters Guild (again, located in every major city). You go talk to the Hall Steward, and you say you want to join the Fighters Guild. Easy enough. Then go to the Fighters Guild Skill Line, and invest a Skill Point in Intimidating Presence.
And yes, you do have to do this on every new character. So even if you’ve already joined the Mages and Fighters Guilds on your first character, you’re going to need to go through this process again on any new characters. It is worth it though. It saves a lot of time when you’re doing quests.
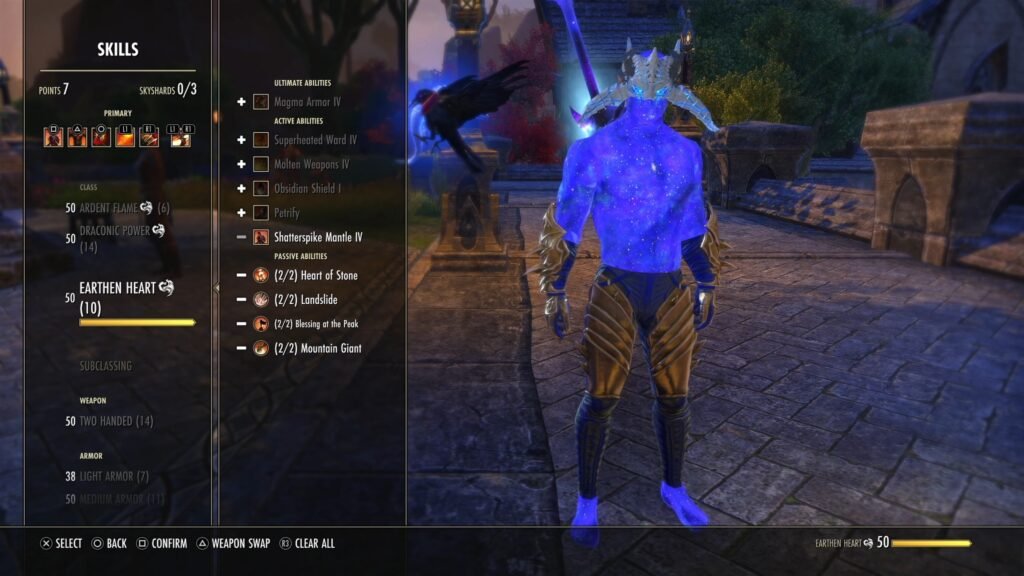
10.) Experiment Freely with Skills & Attributes
I want to take a moment to mention Skills and Attribute Points. As you’re checking out all the different Skills on your particular Class, just feel free to experiment with it as much as you want.
Respecing Skills is now free within the UI as of Update 49. It used to cost some gold to do this or you had to use a Skill Respec Scroll, but now you can just invest in whatever you want, try out anything you want, and if you don’t like it, you can just go in the UI and respec.
The same goes for your Attribute Points. Say you thought you want to be a stamina character, but you change your mind and you want to run magicka instead. You can just respec your Attributes directly within the UI. It doesn’t cost anything.
So, it’s really true that the era of free experimentation in ESO is finally here. Just go wild. Do whatever you want. If it doesn’t work out, you can always just respec for free.
11.) Dolmens Until Level 10
Let’s talk about how to level and where to do it. At least for the first 10 levels, the conventional wisdom is that leveling at Dolmens is the best option. I tend to like running through the Dolmens in Auridon, but the more popular area is definitely here in the Alik’r Desert.
What people tend to do in Alik’r is get into groups — because when you’re in a group, anytime a group member in your area kills a monster, you also get the XP. Running Dolmens in groups is not as popular in Auridon, but you might be able to cobble one together. Dolmens are marked by a whirlpool-shaped indicator on the map, and they flash when that particular one is active.
One thing you should do before you start leveling at Dolmens is make sure you’ve boosted your XP. You can do that either with XP boosting Acrolls or with a potion called Aetherial Ambrosia, a drink that certain players can craft if they have the recipe and ingredients. It increases the XP gain that you get at different levels depending on the type of Ambrosia you have.
The one I just drank, Mythical Aetherial Ambrosia, gives you 150% extra XP. And Ambrosia will last longer if you get the Connoisseur passive in the Provisioning skill line. Getting it is relatively easy. You just need a single basic recipe that you can buy at a Grocer or a Brewer, some ingredients, and then you just need to keep crafting that basic recipe until you get to Level 42.
If you don’t have any Ambrosia, you’ll want an Experience Scroll. These are often given out for free as rewards in the Tamriel Tomes system, what used to be the daily login reward system. Once you’ve been playing for a while, you’ll find that you just stack these up. You can also buy them from the Crown Store, but I really recommend you don’t. It’s kind of a waste of money.
Some sort of XP boosting item combined with Training gear should help you level a lot faster. Also, do keep in mind that certain events throughout the year do give you double XP, so you may want to wait to make a new character until one of those events is running.
Once your XP is boosted, just run Dolmens until you get to Level 10, at which point a whole new world opens up.
12.) How to Join Player Guild in ESO
One of the first things you’ll notice when you get to Level 10 is that you’ve unlocked the Guild Finder. You get to it by going to Social > Guilds > Guild Finder. You have to choose a category of guild to find one. Say “Questing,” and then you have your choice between many different guilds.
Some of them are tiny, some of them are big, but most of them are filled with helpful people who will want to assist you in your journey in ESO. Definitely join a newbie-friendly guild as soon as possible. It helps a lot.
If you’re on PlayStation North America (PSNA), I’d highly recommend that you join the Spopes Fam. We love helping new people. It’s a fun, laid-back environment. We’d definitely be happy to help you out if you’re on PSNA and you’re a new player.
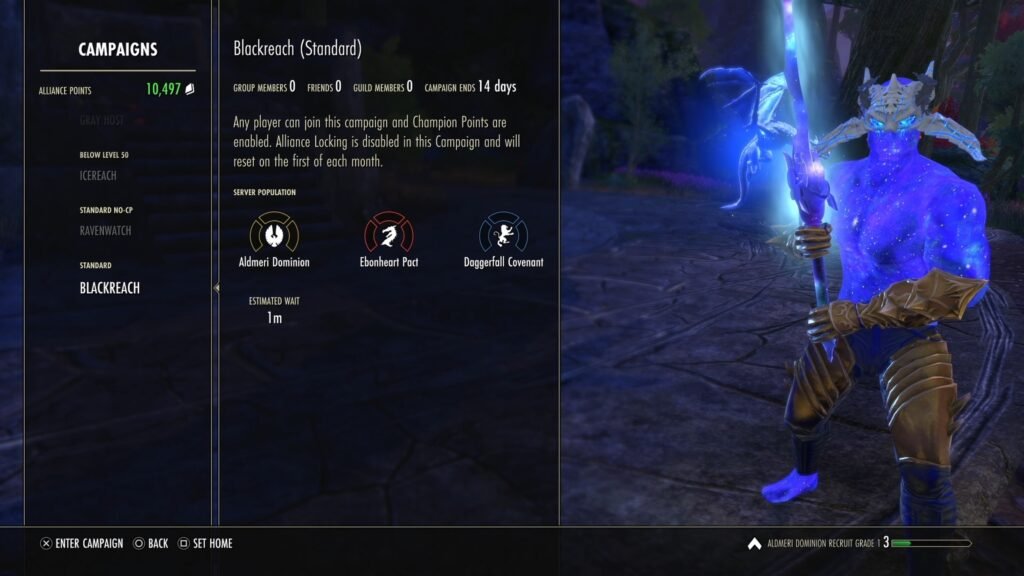
13.) ESO Cyrodiil Intro Quest
Something else you’ll unlock at Level 10 is Cyrodiil. That’s the main PVP mode in the game. And while I don’t really recommend you get into PvP at Level 10, you should still head over to Cyrodiil to do the introductory quest.
It’s quite simple — just talk to the main quest-giver, run around completing tasks, and at the end of it you’re at Assault Level 3, unlocking Continuous Attack, which gives you the permanent buff Gallop that increases your mount speed by 15%.
Your mount is going to be slow at first. Getting this passive only takes about 5 -10 minutes, and it’s definitely worth the effort and time.
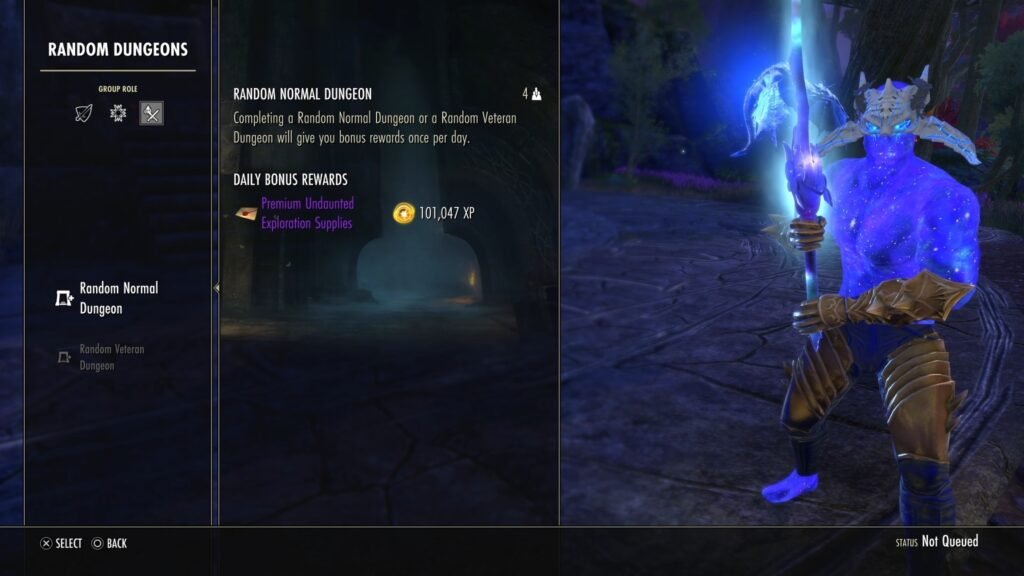
14.) ESO Random Normal Dungeon
Also at Level 10 you will unlock the Dungeon Finder. Doing your Normal Daily Dungeon is going to be the biggest single source of XP while you’re leveling.
You only get this huge XP boost once per day, but definitely start doing your Daily Normal Random Dungeon as soon as you get to Level 10. And while you’re in the dungeon, make sure to pick up the Dungeon Quest because it will give you a Skill Point and a bunch of additional XP.
Don’t run Random Dungeons after your first one per day. The amount of XP you get decreases significantly.
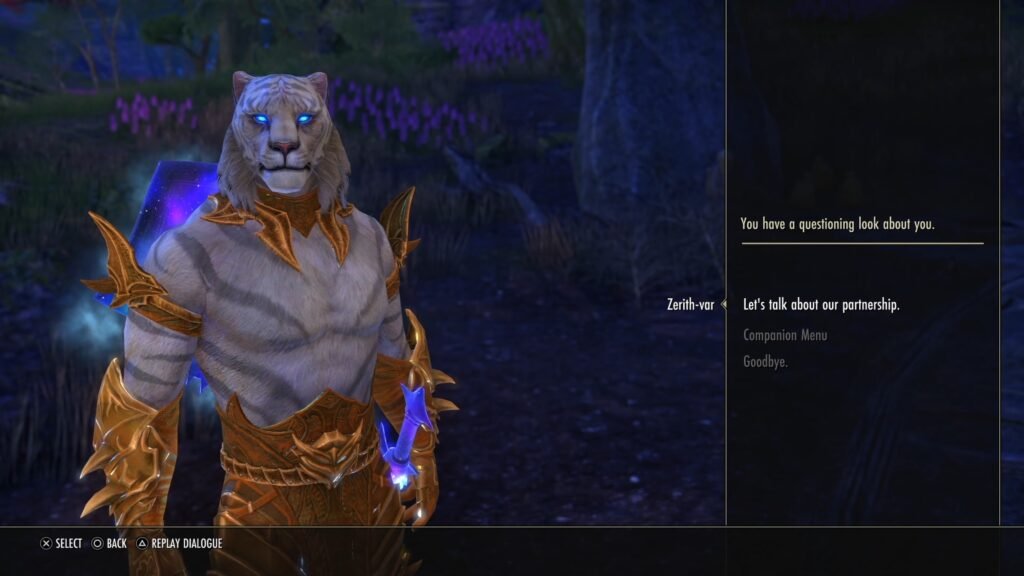
15.) Unlock a Companion in ESO
Something else I recommend you do once you get to Level 10 or thereabouts is unlock a Companion. Companions are extremely useful for leveling because when they tag or kill a monster, you get the XP as well.
However, the quests that unlock Companions are relatively difficult to do before you have at least a few Skill Points allocated. So, wait till Level 10 or so, then pick a Companion, do their quest, and say goodbye to solo leveling.
16.) Continue with Dolmens
So, now you’re in a guild, you have a companion, you’re all XP-boosted up. What do you do now? Well, that’s a subject of some debate. For the leveling process from Level 10 to Level 50, people do it in different ways. I do have a video covering the different ways you can level in the game. But what I generally recommend is that you keep doing Dolmens until at Least level 20 or 30 or so. At that point, you may be able to tackle Public Dungeons relatively easily.
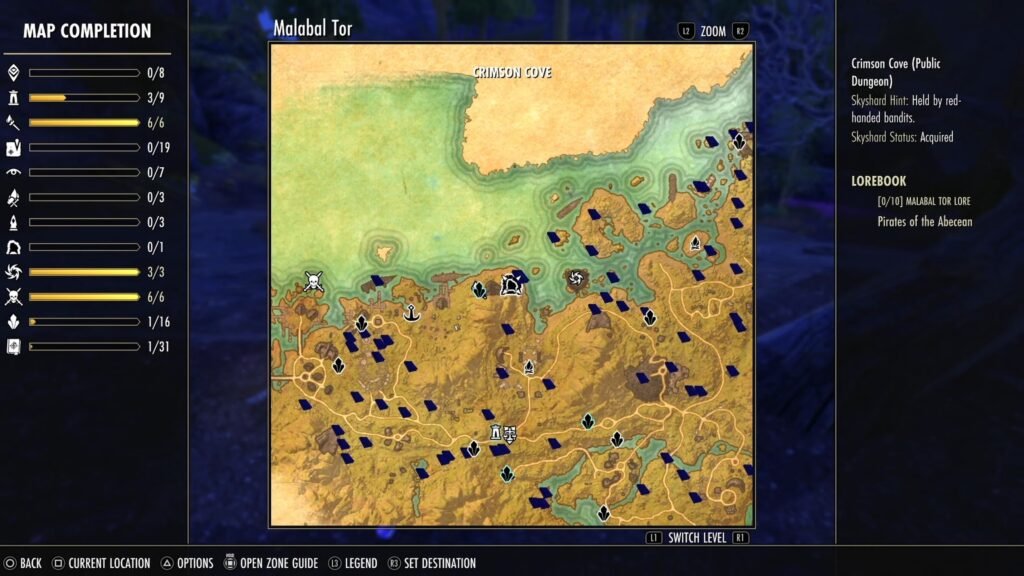
17.) Public Dungeons (if Powerful Enough)
Public Dungeons are marked by the map icon shown above, and they feature much higher densities of monsters than usual dungeons. Once your build is cooking pretty hot, this can definitely be a good alternative.
I do also want to mention that there’s a new feature called Challenge Difficulty that sets handicaps on your character and increases your XP and gold gain. So, one really effective way of leveling is setting your Challenge Difficulty all the way up to Vestige and then teaming up with an experienced player who can run you through public dungeons or other activities.
Conclusion
All right, everybody — that covers my top 17 tips for what you should do first on a new character in The Elder Scrolls Online. My intention was to make this guide as comprehensive and helpful as possible while also not making it absurdly long.
Leave a Reply