
Wield the power of draconic flame to instantly decimate your foes. I have been playing and loving the newly redesigned Dragonknight class in The Elder Scrolls Online update 49. I’m going to share with you my full build guide so you can copy-paste exactly what I’m cooking up here.
I’m going to cover the skills you should slot, the gear you should use, the champion points you should put in your bar, your attribute points, your race, your Mundus, and everything in between.
By the end of the video, you’ll know everything you need to do to make your Dragonknight slap just as hard as mine. Let’s dive into the build guide.
Race
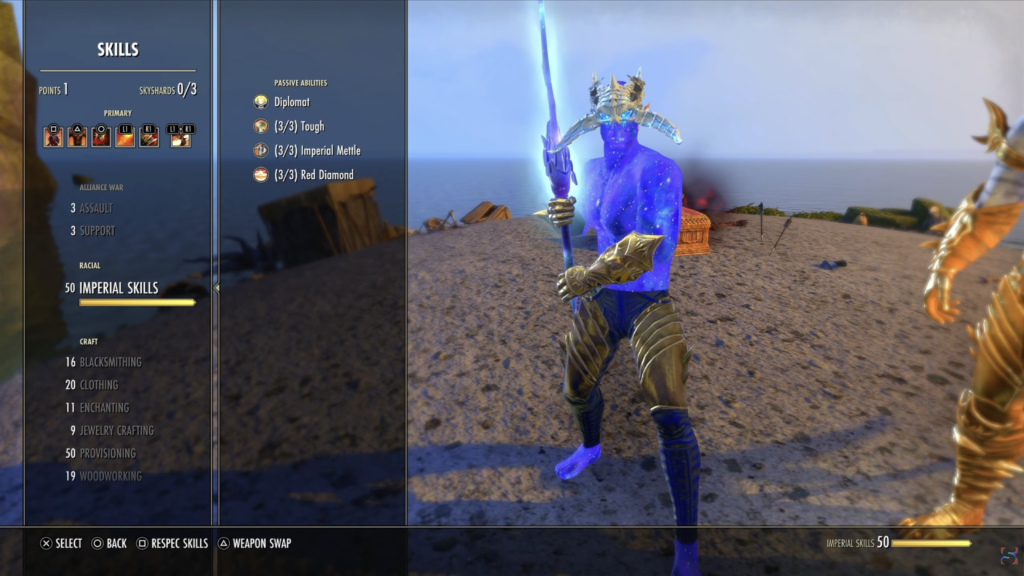
First things first, let’s cover the race I chose for my Dragonknight and why. race really doesn’t make that much of a difference for your build, but I decided to go with an Imperial this time because I’ve never done an Imperial before and I’m kind of tired of Dark Elf builds. Going the Dark Elf route will make you slightly more powerful, but on the Imperial, you have better sustain with extra max stamina and a little bit of extra health, also ability cost reduction.
So, I wanted to focus on sustain. And also, I was curious about the Imperial in general. So, that’s why I chose an Imp for this one. But, choose Dark Elf if you want the absolute maximum DPS.
Skills
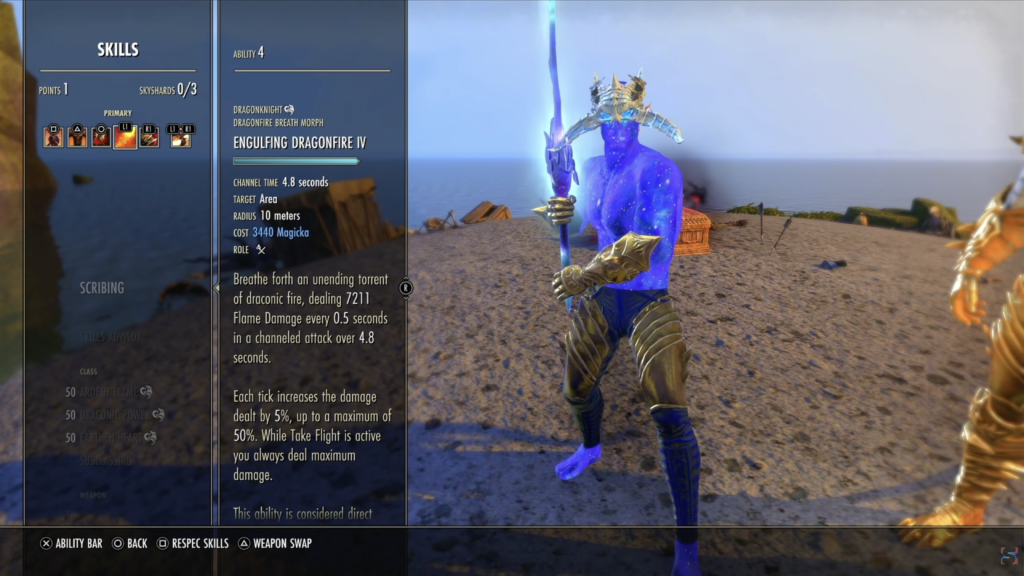
Next, let’s cover the skills I’ve slotted and why. Your main damage dealing skill, even though this is a stamina build, is going to be the magicka skill, Engulfing Dragonfire. This is considered to be the new beam, and it is a wide AoE beam, meaning you can take out trash mobs incredibly easily. It’s also really strong against single target enemies. And most importantly, it just looks really, really cool.
Engulfing Dragonfire is the correct morph. This is the one that makes it channeled. And the fact that it’s both a Direct Damage and a Channeled skill is going to be really important once we start covering the gear.
What’s really cool is this also synergizes with the ultimate Take Flight, where if Take Flight is active, you automatically do the highest amount of damage. Otherwise, the damage this ability does scales over its duration. Starting off relatively weak, but adding another 50% to its damage by the time it finishes up.
To complement Engulfing Dragonfire, we have the two-handed skill, Stampede. Stampede allows you to cross distances between you and enemies very quickly, and it also leaves a damage overtime AoE effect underneath the enemy when you attack. It’s also guaranteed to be a critical strike when you hit.
Overall, Stampede is my favorite two-handed weapon skill. I also do have one more two-handed skill slotted on my bar. That’s Executioner. I often forget to use it, but this is great when enemies have 50% health or less. It deals up to five times the normal damage.
So, as the name of the skill implies, this is a great execute ability. The main reason I have it is as amazing as Engulfing Dragonfire is, you don’t have any way to restore your magicka aside from potions. So, this works only so far as a main damage dealer. It gets you through the first 50% pretty easily and then you switch to Executioner once the enemy is weakened enough for that ability to start doing its extra damage.
The remaining abilities on my bar include Blood of the Elder Dragon. Just like Engulfing Dragonfire, this is a Draconic Power skill. This heals you and nearby allies, and it increases in power depending on how much health you’re missing. Otherwise, its benefits are redundant with the Oakensoul Ring, which this build does use, but it’s an excellent instant burst heal, and it also does heal your allies.
I also have on my bar Shatterspike Mantle from the Earthen Heart skill line. I like how it has a unique buff where it just increases your overall damage by 100 and it also does a damage over time effect for any enemies hit by the initial blast. The Major Resolve it provides is redundant with the Oakensoul ring. But, adding that extra damage over time and increase to your overall damage is definitely a benefit.
The last skill is my ultimate, Take Flight. This is the new form of Dragon Leap. It looks way better. It knocks enemies up into the air, and it also provides an effect that lasts for 15 seconds that increases your overall damage done by 10% — or 20% against monsters.
Plus, as I mentioned, this instantly maxes out your Engulfing Dragonfire skill. So instead of having to wait till the end of the skill for it to do its max amount of damage, it just does max damage right from the start. This is definitely a really cool ultimate. I am enjoying it a lot.
Passives
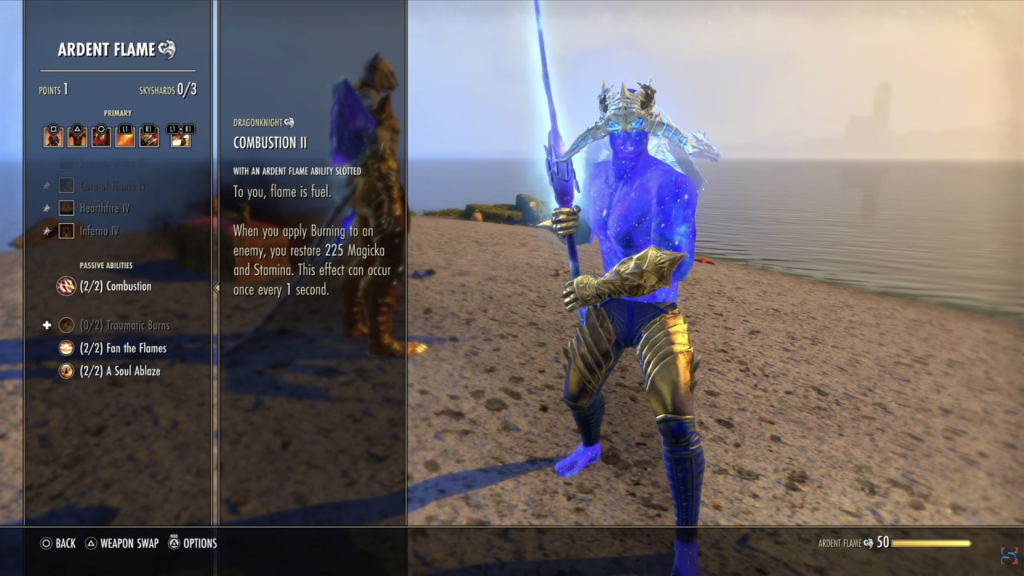
That does it for the active skills. Now let’s cover the passive skills you should invest into. In the Dragonknight’s Ardent Flame skill line, you really don’t need Traumatic Burns because you’re not using any Ardent Flame abilities, but do get Combustion, Fan the Flames, and Soul Ablaze.
Combustion is a little bit different now, but it does help with sustain. It restores magicka and stamina. In the Draconic Power skill line, you’re going to want to get all the passives there. You’re not going to be blocking that much, so you might not want to grab Burnish Scales, but World in Ruin, Elder Dragon, and Storm Voice are absolutely essential.
You should also get everything under Earthen Heart to boost your armor. Get Landslide for sure. This is a really cool skill where every time you do damage, it gives you a stack and you can get up to 10% increased damage. Blessing at the Peak is useful when you use Shatterspike Mantle — you get ultimate. And you might want to skip Mountain Giant because you’re really not using heavy attacks very much, but it does apply Off Balance and gives you stamina when you do use heavy attacks.
Get every passive under the Two-Handed skill line. Every passive under Medium Armor and also Light Armor. As you’ll see when we get to the gear, you are wearing one piece of Light Armor basically just to get these passives.
I also haven’t even unlocked the Undaunted skill line on this character yet. But if you do and you want to grind all the way to Level 9, I do have a guide covering how to level the Undaunted skill line. Then you should get Undaunted Mettle because that will increase your overall damage by 4% because you have both Medium and Light armor equipped.
And of course, get all the passives under your racial skill line, whatever race you end up choosing.
Attribute Points & Mundus Stone
Let’s cover your attribute points and your Mundus stone. For the maximum amount of damage possible, you want to have either your stamina or your magicka be considerably higher than the other. So, you’re going to be dumping all of your attribute points into stamina.
Also, choose the Thief Mundus to increase your critical strike chance. As you can see, your magicka is pretty low, but honestly, Engulfing Dragonfire doesn’t use very much magicka. Neither do your other skills, so it generally doesn’t matter if your magicka is pretty low. And that does it for the attributes in the Mundus.
Gear
Let’s move on to the gear you should use. On this build, we are combining the Deadly Strike set with the Tideborn set, and we’re using Oakensoul in combination with the Slimecraw monster helm.
Going into the details, you’re going to want a greatsword on your two-headed weapon for increased weapon damage. It’s going to be the Deadly Strike set. I recommend the trait Sharpened for increased penetration. The meta with Dragonknight used to be the Flame glyph for your enchantments, but you may want to switch to the Weapon Damage glyph instead.
You used to want to do the Flame damage glyph to trigger Combustion, but its effects have now changed and you’re getting plenty of Burning from other sources.
Since this is an Oakensoul build, you are not going to have a secondary weapon on your back bar. On the head, I chose Slimecraw. That’s because it gives you the highest amount of critical chance from any monster helm in the game. Plus, Slimecraw is like a crocodile, so it fits the whole dragon/lizard theme of the build. And I made my Slimecraw mask in Medium and put a stamina enchantment on it along with the Divines trait.
Now, we’re getting into the Tideborn pieces. I have Tideborn on my chest, my arms, my hands, and my legs — all in Medium. And on all those pieces, I have Divines with stamina. Where I break from the theme slightly is on the waist, which is still Tideborn, but it’s in Light. Still a stamina enchantment with Divines. But, I threw light on my belt because the belt provides the overall least amount of armor, and I did want to have at least one piece of Light armor here to get the light armor passives.
Remember that to unlock the Light Armor skill tree, you will need to at least temporarily equip at least three pieces of Light Armor. But once you’ve done that and unlocked the skill line, you can just go back to having Light Armor only on your waist.
Then we’re getting back into Deadly Strike on the boots. Deadly strike is always Medium. So this is in Medium armor, stamina, and Divines. Your last two pieces of Deadly Strike are going to come from your neck and your first ring slot. I chose Infused for this build. Bloodthirsty would probably work too as an alternative trait.
And then the Spell Damage glyph on all three jewelry pieces. I did this instead of the Weapon Damage glyph in order to give myself some extra magicka recovery. If you find that your stamina recovery is what needs it more though, you could switch this to the Weapon Damage glyph instead.
And then on the last piece, I have the Oakensoul ring, which I have on every single one of my builds. I am an Oakensoul user for life. It makes things so much better and easier. Makes the game so much more enjoyable for me. For those that don’t know, this is a Mythic you get from the High Isle chapter. I do have an old but effective video on how to get it.

Champion Points
That does it for the gear. Now, it’s time to cover the Champion Point nodes you should slot in your blue and your red trees.
The green tree is irrelevant for combat. We’re going to skip over that.
But in the blue tree, you’re going to want Fighting Finesse for increased critical damage, Master at Arms for increased direct damage because your skills mainly do direct damage, Biting Aura to increase the damage of your area of effect skills (that’s going to apply to Engulfing Dragonfire and Stampede). Then also Reaving Blows.
Aside from those active skills, just try to get all the passive skills in the blue tree. You’re generally able to do that by the time you get to CP 1600 or so.
Then over in the red tree, you’re going to want Celerity to increase your movement speed, Fortified for increased armor, Boundless vitality for increased health, and Rejuvenation for increased recovery. However, when you’re going around and killing trash mobs, you may want to slot in Bloody Renewal instead.
I found that using Stampede to run around dungeons does deplete your stamina relatively quickly. Bloody Renewal will make sure you get it back as you decimate trash mobs.
Consumables
We’re nearly done with the build. All we have to do is cover the consumables you should use.
I generally like the food Bewitched Sugar Skulls for basically every purpose. It increases all three of your main stats and also increases your health recovery. You get this from Witches Festival, and generally the recipe is pretty cheap in guild traders.
When it comes to your potion, I generally am lazy and just go with the Crown Tri-Restoration potion. I never seem to run out of these. I don’t really use potions very much, but if you want, you can probably craft your own tri-restoration potion, which might be a little bit better. But for me, the Crown Tri-Restoration potion is just fine.
Boss Rotation
Generally, you’re just going to need Stampede and Engulfing Dragonfire. Once the boss appears, jump in with Stampede. Use Shatterspike Mantle and then spam Dragonfire to heal yourself and do lots of damage.
Use Take Flight in there if you have the opportunity. And then once the boss is down to half its health, start using Executioner to finish it off. Make sure Stampede stays procced. Maybe use Shatterspike again if you get the opportunity, but otherwise just execute the crap out of it at the end, dealing more damage as it goes down in health. And that’s just about all there is to it when it comes to bosses.
Trash Mob Rotation
Where this build really shines though is in taking down trash mobs. I have never come across a build that is this fast at taking down trash mobs. Whether it’s in a Public Dungeon or in a Group Dungeon, it is crazy powerful because it has this beam skill that is an AoE beam, meaning that it can target multiple enemies at once.
You can kind of do that with the Arcanist beam, but not in the same way. They all basically have to be lined up within a 3m radius. But with this, you can go right into the midst of the enemies and just take them all out at once.
You jump onto the pack of trash mobs with Stampede and then cast Engulfing Dragonfire, and they get melted basically instantly. It is extremely fast.
But being able to close the distance with Stampede and then just start blasting the Dragonfire, this makes it so fast just going around rooms in a dungeon, getting ahead of your allies in group dungeons. I noticed I was just taking out entire packs of enemies before my team could even get there when I did a group dungeon.
Conclusion
That’s going to do it for the build. I have covered the best race, the best skills, the best gear, champion points, consumables, everything. I’m just overall really impressed with the Dragonknight. It feels better, it sounds better, it looks better. I can tell the developers put a lot of thought into the new direction for this class, and seeing the Dragonknight in action makes me so excited for the changes coming to the other classes in the near future in ESO.
Leave a Reply